This post was originally posted on Solo2.org in June of 2004, but the site has gone away (it might come back) so the post was lost. I think I’ve corrected all the links and am posting it here. I will be doing the same with other old posts.
Disclaimer: This article is just an example of a task we completed on the Project 350Z. We do not recommend you try this yourself unless you are a trained professional. We cannot be held liable for any damage to your vehicle or harm you cause to yourself while working on your vehicle. Please use safety equipment, our work was done on a vehicle lift, if you use a jack, use jack stands for safety.
Project 350Z Koni Sport Install
I finally broke down and bought some Koni Sports for the Project Z. I say finally, but they really have only been stateside for 2 months now, so I didn’t wait all that long to order them. At the end of this write-up, you’ll find a summary of my autocross career, to get a better understanding of the author of this piece.
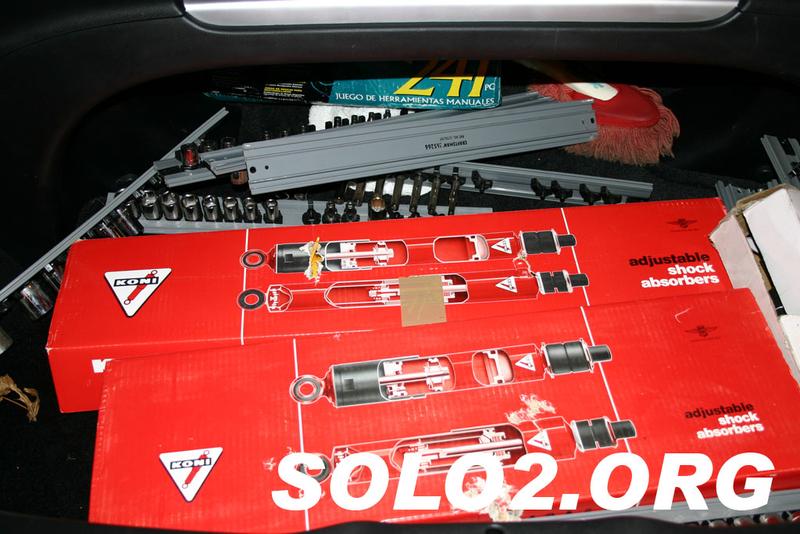
The part numbers are as follows:
- 8241-1216L Sport Left Front
- 8241-1216R Sport Right Front
- 8241-1217 Sport Rear (single)
Installation procedures I have the Nissan Service Manual for the 350Z, and would highly recommend purchasing one as they are invaluable when it comes to working on your vehicle. I won’t be using any photos from the manual, as reproducing it on the web would most likely be a little frowned upon by Nissan. I will, however, try to include pictures with notations on installation procedures.
I would also recommend checking out the article on SportZ Magazine’s latest issue on the Koni install procedure, I received a copy of the article and found it to be very helpful.
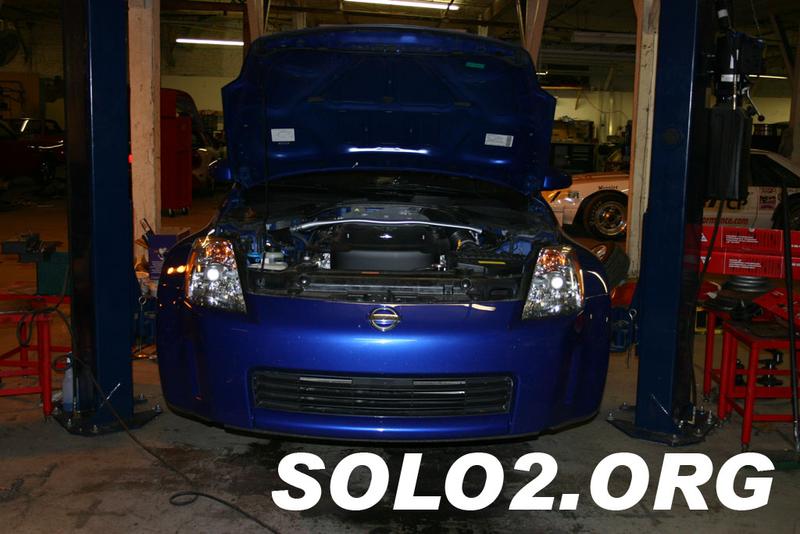
To begin the car was placed on our lift and raised off of the ground about 3 feet. We removed all four wheels from the vehicle before we did any other work to make everything easier and to get them out of the way.
The shocks come in two separate boxes, one box for the
fronts, and one for the rears.
Rear Shock Install I started with the rear of the car, and it was by far the easiest method to take. The rears each require the removal of 1 bolt, and 2 nuts to remove from the car.
Once you have one removed from the car you’ll see the top
mount.
I removed this top nut from the shock using an impact gun. It may take a little working with to get it removed without spinning the shaft too much, but if you drive it back on and off a few times it will usually free up. Being that this was a stock shock which would only go back on the car if I sell it, I wasn’t too concerned with spinning the shaft. I do not recommend using a gun to drive the nut back onto the Koni shock, more on that later.
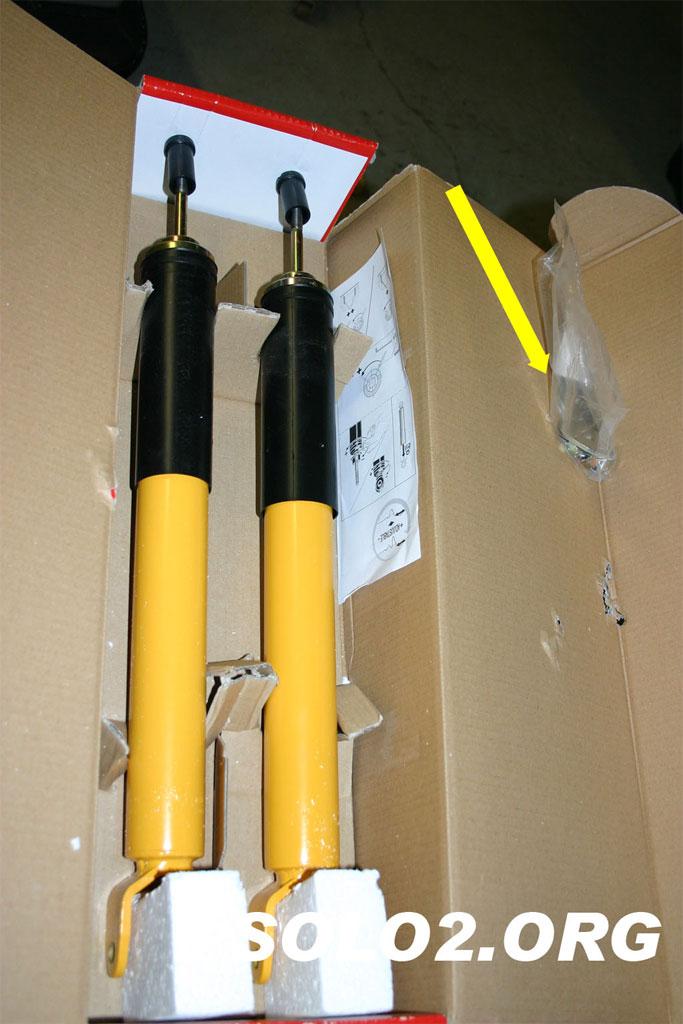
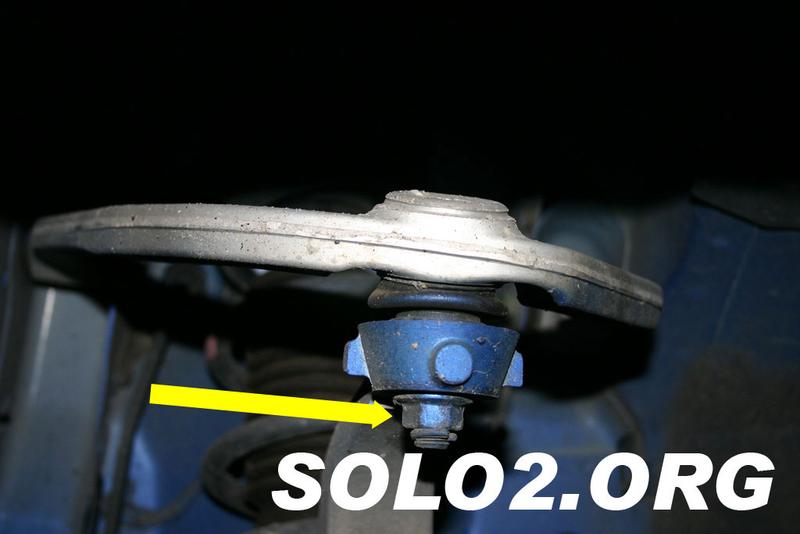
Now to reassemble the rear shocks. I didn’t take a picture
of the parts included with the rears but you can sort of
see this bag in the picture below (yellow arrow), there is
a nut in there for the bottom shock mount, a nut for the
shaft, and a what is really just a large metal washer that
goes into the upper shock mount.
This is how the stock upper mount comes off of the stock shock (upside down). You’ll want to set aside the metal shield that has a red arrow marked discard on it.. The washer is used to keep the rubber grommet (yellow arrow marked grommet) from pushing down on the rear shock adjustment mechanism. Please notice the installation order in the picture, you would really hate to get everything installed incorrectly wouldn’t you? (see our front install for an example ?) You’ll notice a little orange ring; to me it appears to be a gasket for the upper mount to the body of the car. I just left this in place throughout the install. Please see the included Koni paperwork, what little there actually is, for the proper torque settings for the nut on the top of the shock. You can tighten down this nut with a wrench, and use a pair of pliers or channel locks to hold the shaft in place, notice the flat sides of the top of the shaft for this.
When putting the shock back onto the car here is a tip I pulled out of the article in SportZ Magazine. You can compress the shock before you put it back on the car, it will slow rebound it self back into position, but it should give you PLENTY of time to get the shock in place on the car. I would recommend compressing the shock, get it lined up with the lower mount and the upper mount, then put the bolt (from the stock shock) into the bottom mount of the shock with the Koni included nut on the other side of the mount. This will keep the base of the shock in place while you try to get the upper mount installed.
The upper mount may be a little tricky to line up, if the shock doesn’t rebound completely to the top of the fender wheel (to the mounting bolts) you may try raising the rear suspension of the side you are working on with a jack, basically compressing it as though the car where sitting with weight on that corner. This will allow getting the shock into the upper mount properly without too much hassle. Tighten down the bolts on the top mount, see image 16 above. One thing to remember when doing this install, you want the adjustment mechanism of the shock to be easily accessible, so you want it facing out, you should be able to turn it a little when you have the shock back on the car, but it’s best to try to have it facing out to begin with.
Don’t forget to torque down the lower mount as well. The article from SportZ Magazine recommends doing this while the car is setting on the ground, for the front and the rear shocks, as tightening the lower mounts at this time help to prevent premature wear on the components. That isn’t exactly the easiest thing to do, but I would highly recommend it. If you don’t get the lower bolt/nut tightened well you will get a clunking noise from this lower mount. (ask me how I know).
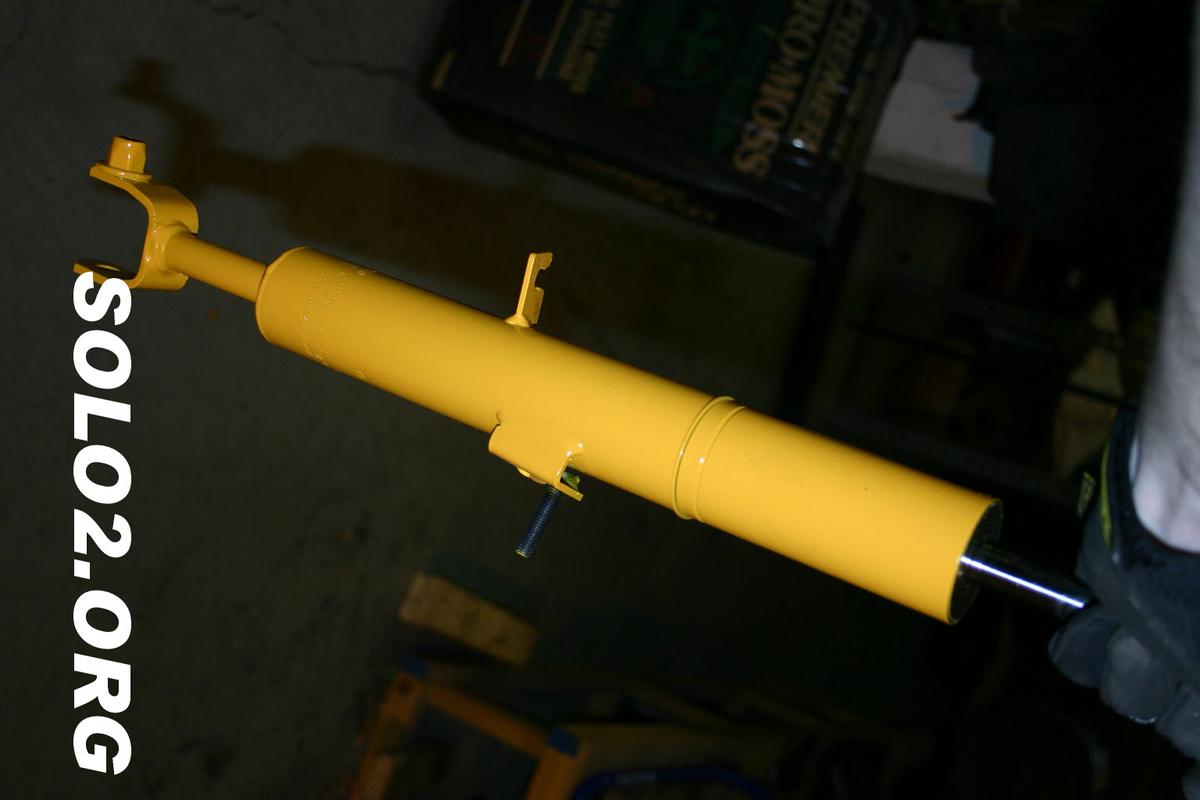
Repeat this process on the other rear shock for the car. This is what it looks like when finished.
Front Shock Install The front shock install requires a bit more work than the rear install did. You will also need a spring compressor of some sort to disassemble the front shock units. I borrowed this tool from a local autozone. Basically the way it works is you pay for the tool and you return it when you are done if you want your money back. This isn’t like the Wal-mart rental policy; this is actually a legit program.
The FSM tells you to remove the wheel, and then the under cover. I never did figure out what the “under cover” was that it referenced, but I obviously didn’t have to remove it to get the shock out if I couldn’t find it.
(This step differs on cars with TCS and VDC, this step was performed on a car with only TCS) Next you will remove the Wheel sensors from the back of the hub. The wheel sensor has a cable that is marked with the yellow arrows in this image . This image shows what the sensor looks like mounted on the back of the hub. . When removing the wheel sensor be careful, the FSM specifically says not to pull on the wheel sensor. Pull out the two grommets where the wire is attached to the shock body, and then use a wrench or socket to remove the bolt holding the sensor itself to the hub. Place the sensor up and out of the way, try not to twist the cable too much, when you go to install the sensor again make sure that the white line does not twist upon install. I set the sensor on what I would assume is the “under cover” towards the front of the car to keep it and the cable out of the way while I removed the shock. .
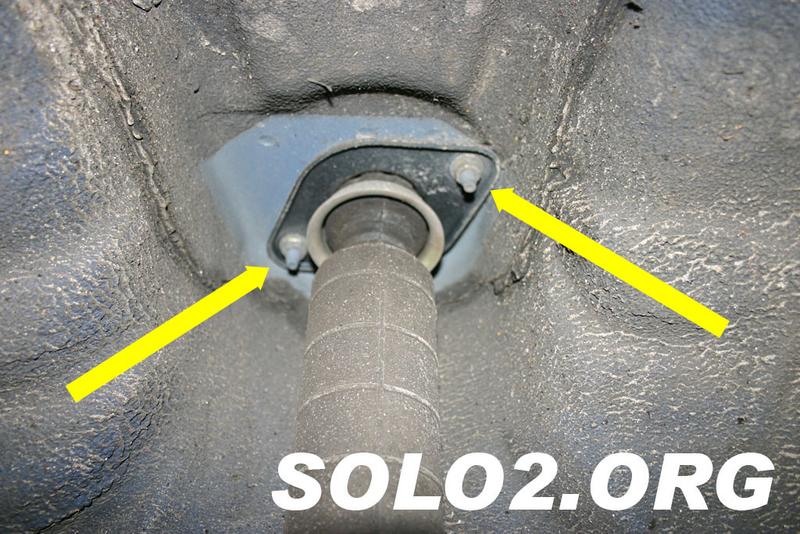
Next remove the nut that holds the brake hose to the shock
absorber . Pull the mount off of the shock and push the
brake line aside.
You’ll also need to remove the strut tower bar. To do this you’ll want to fix the center bolt in place and loosen the nut on the left and right side of that center bolt. Once those are lose you’ll want to turn the center top towards the rear of the car 660 degrees, that should place the silver mark of the center bolt above. Remove the 3 bolts and one nut from each of the strut bar mounts and remove the bar from the vehicle.
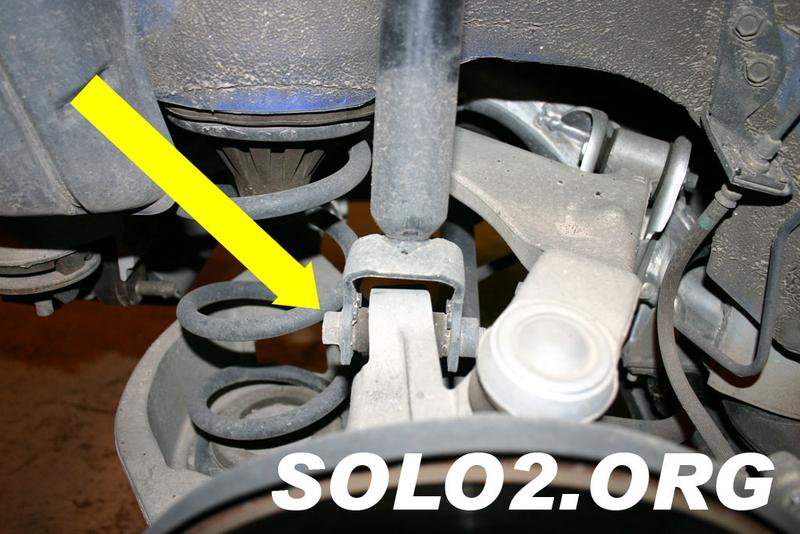
One thing the FSM doesn’t tell you to do, but the SportZ
article recommends is to remove this cotter pin and nut,
this will give you some slack when removing the shock and
make removal a lot easier. Note: Yours should not be
painted, I took mine to a horrible place and they did a
horrible job repainting the front end. I also remove the
nut from the sway bar link to the transverse bar (no
picture).
Remove the bolt and nut on the lower shock mount, holding the shock to the transverse link. (I don’t seem to have a picture of this either). You may want to leave the bolt in the lower mount to help keep it in place while you perform the next step.
Now you’ll remove the nuts from the upper mount, you should see them exposed by the removal of the strut bar. Remove the bolt from the lower mount and you should now be able to pull the assembly off of the car. If you need to you can put a little pressure on the break disc to push the lower suspension assembly down to give you better access to remove the assembly.
Front Shock disassembly (ALWAYS USE CAUTION WHEN WORKING WITH SPRINGS) Using the spring compressor from the picture above compress the spring so that it has a little play between the lower spring perch and the upper mount. This will allow you to remove the nut from the top of the shock. I used an impact gun for removal, if it doesn’t come off easily on the first try, drive the nut back down and try removal again, working it in this manner helped me remove the nuts without much trouble. Without an impact gun, you’ll need to try to hold the top of the shock in place with locks and turn the nut with a wrench. From past experience, try to use an impact gun for this, or you should spend hours trying to get things apart.
Once you have the nut free remove the upper mount and boot (attached) you can then remove the compressed spring.
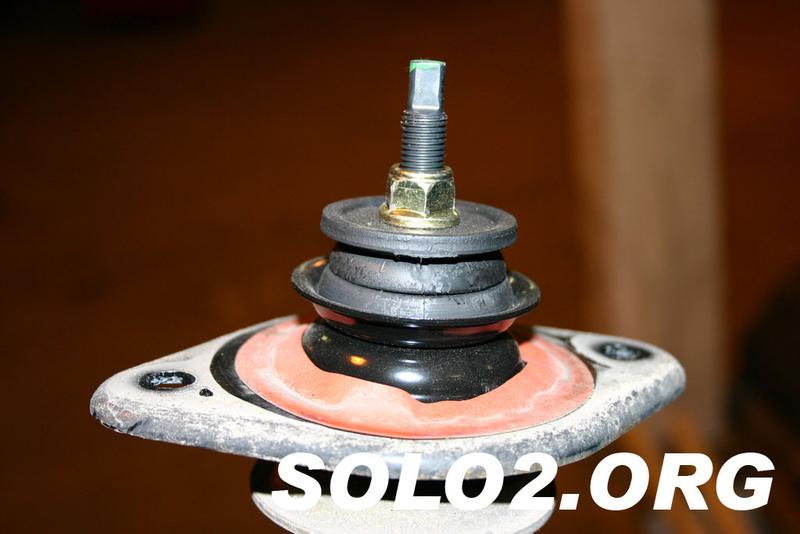
Koni supplies you with these parts, along with a spring perch that goes on the shock body. The white washer goes on top of the shock body (yellow arrow) and the spring perch sets where the red arrow is pointing. This is NOT how the spring perch goes, this picture shows the perch in an upside down position. To see if you have the perch lined up properly put the perch on the new shock and hold the new and old shock side by side, you’ll see if the perches line up. I learned that little trick after I reassembled the right front shock, so I had to redo that side.
When holding them up side by side you should be able to line the perch up on the new shock body closely to the way the perch is fixed on the stock body. This allows for the proper placement of the spring, which eases the assembly of the assembly back onto the vehicle.
Place the spring back onto the perch, still compressed in the spring compressors, and then put the boot and upper mount back onto the shock. You will at this time need to put the washer and nut included in the picture of parts above back onto the shock. This should be done by hand, not with an impact gun as you don’t want to PreLoad the shock’s rebound settings by twisting the shaft. You should be able to hand twist the nut on, and use a pair of wrenches to get the nut on securely. If you do not get this nut on tight it WILL make noise. It took me a few days of lifting the car up and down trying to figure out where I was getting a knocking from. It ended up being because when I had to redo the right front shock I didn’t get the nut on the shaft of the shock tightened down properly. The proper torque settings are included in the Koni documentation, which I do not have handy at the moment. Once you have the nut tightened down on the shock you’ll need to remove the spring compressors.
Now it’s time to install this assembly back onto the car. I did the install in this manner. Get the top of the shock assembly into the general area of the upper mounting point so that the shaft of the shock is inside the open hole at the top of the mount. Try to get the lower mount into place, feed the included bolt from Koni into the lower mount to hold the assembly in place but don’t tighten it down yet. From the top of the car, you can pull up on the spring to raise the suspension assembly into place to align the three bolts in the upper strut mount to line up properly with the three holes in the body of the car. Get at least one of the nuts started so that you can quit pulling up on the spring!
Everything else should be fairly straightforward to reinstall. Be sure to properly torque everything down to the settings in the FSM. When installing the wheel sensors be sure to not twist the cables. I can speak from experience, go over everything, make sure you tighten everything down, the little knocks get rather annoying, and it’s easier to get everything the first time then to have to go back and look for something you missed.
I’ll have to do a write-up on the performance of these shocks next week. From a week and a half of driving, and one autocross event though I will include a few observations.
First Event on Konis I ran a two day divisional less than 48 hours after installing the Koni’s on the Project 350Z. The first day I started with the rear shocks at 3 turns from full soft, and the front at one full turn from full soft. To give you an idea of what settings the shocks have I believe the rears have 12 turns to get to their stiffest rebound setting, and the fronts appear to have 2.5 full turns from soft to firm. Each turn on the rear is probably ¼ of a turn if they were adjusted from the top as the fronts are.
After my 2nd run I decided to try taking out ½ turn from the fronts. This was what I would call a mistake! The car got extremely loose on my 3rd run, which helped to kick the ABS ice-mode on, a problem I had last year at the Topeka ProSolo, and Carter had in his 350Z at Nationals last year. We figure this is caused by the car sensing one wheel is different from the others, probably off the ground when the others are on the ground, so the brakes freak out and don’t want to stop the car. It doesn’t pulse like ABS is kicking in, but the car stops breaking like it should and decelerates at a slower rate. My 99 Camaro had the same problem on the Topeka concrete under extremely hard braking.
For my 4th run I put ¼ turn back into the shocks, this made a pretty good combination, as the car felt more settled than run 3, but still loose enough to work with. On Monday (2nd day) I left the settings the same on the car, and ran a bit closer to the leader in BS for the weekend. I ended up in 3rd for the event, I had been in 4th by .005 or so behind Lee from Oklahoma in a Track model 2004 I believe.
I’m headed to OKC this weekend for the 2nd divisional event, and will report back on my settings when I return! I hope this is helpful to someone else out there in doing their install. If you have any questions, or notice any blatant errors in this please feel free to let me know via the comment section of this blog!
About the Myself (the author) I’ve been autocrossing since March of 2000. I started out in a 1994 VW Golf III, and competed in that car for about 15 months. I competed in my first National Tour event in Peru Indiana in July, and then the SCCA Solo II Nationals in September. I finished last in both events in the newly formed STS (street touring) class. In July of 2001 I decided I wanted to buy a car that I knew could be competitive with just the minor modifications that were allowed in the stock classing structure of SCCA Solo II. I decided on F-Stock, and started looking for a 4th Generation F-Body (Camaro) that would suite my needs.
I was looking around St. Louis for a few weeks for a LS-1 powered (98+) 6 speed, that wasn’t in Red. I found a 1999 Z-28 in Macon Missouri and picked it up. I immediately purchased a set of Koni Shocks for the car, an extra set of wheels, and some R-compound tires. At the Solo Nationals that year (2001) I still got kicked in the rear, but not near as bad this time! I can’t seem to find the results from that year, but I think I finished something like 47th out of 54. In 2002 I finished 14th in F-Stock out of 35+ entrants. I also finished 3rd in F-Stock at the Topeka ProSolo that April.
In 2003 I decided to change vehicles and purchased my 2003 Nissan 350Z Enthusiast model. I acquired a second set of the stock Enthusiast 17” wheels for a set of R-compound tires. I competed last year at the Peru National Tour, the Topeka ProSolo and the SCCA Solo II Nationals. At Nationals I finished 43rd out of 60 drivers. I was the second fastest 350Z driver, but far behind Carter Thompson who finished 6th. I was also running on Kumhos, even though the 2003 Results say I was on Hoosiers.
Along comes 2004, I kind of lost interest in autocross up through the end of May. I guess I go through a little lull every year, this year it happened in April and May. To get out of the lull I ordered the Koni Sports (yellows) for the car.