1975 Triumph TR6 Tracking Down an Electrical Short
Getting the TR6 back on the road after an electrical short.

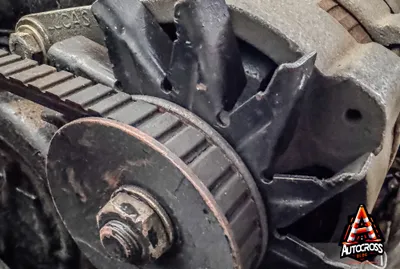
It is one thing after another with the TR6 over the past 24 months. Fall ‘23 the alternator gave out and needed to be replaced to get the car back on the road. That took me far too long to get to.
Then it was last fall that I went to get it out and the brakes were hardly working. Took me too long this spring to track down and fix that issue (replaced lines in the rear of the car but ultimately it was replacing the master cylinder that fixed the issue).
With the brakes working again I decided it would be great to get the car out for fall. It started right up, but I noticed immediately that the fuel gauge wasn’t showing any fuel, I was pretty sure I hadn’t parked it empty. I then noticed that the turn signals weren’t working and then upon further inspection the brake lights weren’t working either.
Electrical issues was something new for me to try to track down. I was able to diagnose that a fuse was blown in the engine bay, so the first thing I did was tried replacing that fuse. It blew again as soon as I turned the ignition on.
From there I turned to ChatGPT to try to help me diagnose the issue. Here’s a summary from ChatGPT of what I did to track down the issue:
This project started with a simple symptom: the green-circuit fuse kept blowing as soon as the ignition was turned on. That fuse feeds a wide range of accessories—wipers, heater fan, fuel gauge, brake lights, and more—so finding the cause required a systematic approach.
1. Establishing the Symptom
We confirmed the correct fuse was blowing and used a multimeter in continuity mode to test the green-circuit output side of the fuse block.
With the fuse removed, the meter beeped, indicating a direct short to ground somewhere on that circuit.
2. Isolating Circuits Inside the Cabin
One by one, each green-fed accessory was disconnected:
- Wiper motor and switch
- Heater blower
- Turn-signal flasher and stalk
- Brake-warning lamp
- Voltage stabilizer and gauges
After each disconnection, the short remained—so the issue wasn’t in any of those front-of-dash systems.
3. Splitting the Harness at the Firewall
At the firewall connector (where the interior and engine-bay/rear harnesses meet), unplugging the connector made the short disappear.
That told us the fault was downstream of that junction, not in the dash harness.
4. Testing the Rear Harness
Using the connector pins as test points, we identified three pins with continuity to ground—each corresponding to green wires feeding the fuel gauge, brake lights, and reverse-light circuits.
Physically inspecting the harness revealed that the rear harness branch was the culprit, not the engine-bay wiring.
5. Inspecting the Rear Lighting
Further investigation showed:
- An old red add-on wire running from front to rear had been spliced into the tail and brake lights—likely an old repair.
- Disconnecting that aftermarket wiring didn’t clear the short, but unplugging the brake-lamp and fuel-sender connections did.
This narrowed the issue to the brake-light circuit.
6. Discovering the Real Culprit
When testing the brake-light switch at the pedal, we found it fell apart when trying to pull the wires from the housing.
The assumption is that allowed the live terminal (green wire from the fuse) to touch the grounded pedal bracket, intermittently creating a direct short and blowing the fuse.
7. Repair and Verification
We:
- Removed the broken switch.
- Verified with a multimeter that the new switch operated correctly (open at rest, closed when pressed).
- Installed and adjusted the new switch so the plunger just touched the pedal arm with slight preload.
- Reconnected the rear lamps and tested again.
With the new switch installed:
- ✅ Fuse remained intact
- ✅ Brake lights worked perfectly
- ✅ All other green-circuit accessories operated normally
Key Lessons
- The TR6 green circuit powers many unrelated accessories; isolate each branch systematically.
- Continuity testing with the fuse removed is the safest way to chase shorts.
- Cracked plastic electrical housings can cause intermittent, destructive faults even when the switch “tests good” out of the car.
- Always check for old add-on wiring—repairs from decades ago are frequent sources of electrical gremlins.